
タイトル: pyRevitの導入と簡単なアプリケーションの作成
SEOタイトル: 【PythonでRevit API】pyRevitの導入と簡単なアプリケーションの作成
| この記事の要点 |
|---|
|
目的
pyRevitを導入し、簡単なアプリケーションを作成する。
前提
OS: Windows
pyRevitのインストール
https://github.com/eirannejad/pyRevit
上記のgithubからpyRevitをインストールする。
exeファイルをダウンロードして、インストーラーに従い処理を進めれば良い。
エクステンション格納用フォルダの作成
自分で作ったプログラム(extension)を格納するためのフォルダを任意の場所に任意の名前で作成する。
例: c:\MyExtensions
Revitの起動と設定
Revitを起動する。
「pyRevit」 → 「pyRevit▼」 → 「Settings」を押して設定画面を開く。
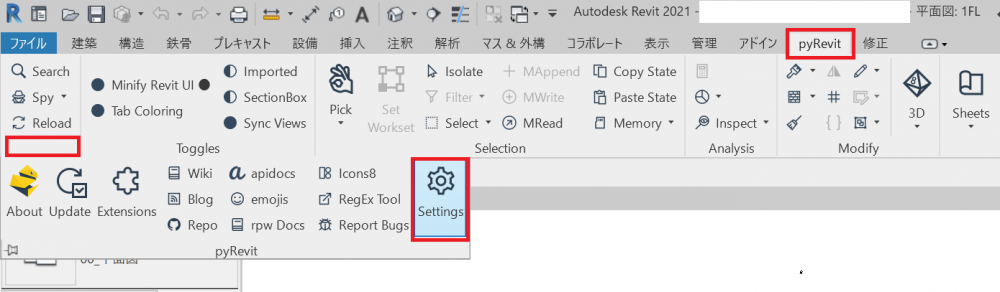
「Customer Extension Directories」を選択して「Add Folder」を押して先ほど作成したExtension用のフォルダを設定する。
以上でインストール作業は完了。
プログラムの作成
pyRevitのエクステンションはルールに則って作成したフォルダに格納する必要がある。
以下、フォルダとスクリプトの定義例。
|
MyExtensions/ └── MyFirstExtension.extension/ └── MyTools.tab/ └── MyTools.panel/ └── MyFirstCommand.pushbutton/ ├── icon.png └── script.py |
以下、script.pyの中身。例なので内容は何でもよい。
| ファイル名 |
|---|
| """Calculates total volume of all walls in the model."""
from Autodesk.Revit import DB doc = __revit__.ActiveUIDocument.Document # Creating collector instance and collecting all the walls from the model # Iterate over wall and collect Volume data for wall in wall_collector: # now that results are collected, print the total |
プログラムの実行
Revitをリロードする。

定義したタブが出現するので選択して、スクリプトの開始ボタンを押す。

画面上の壁の要素が定義されていれば、合計ボリュームが表示される。
